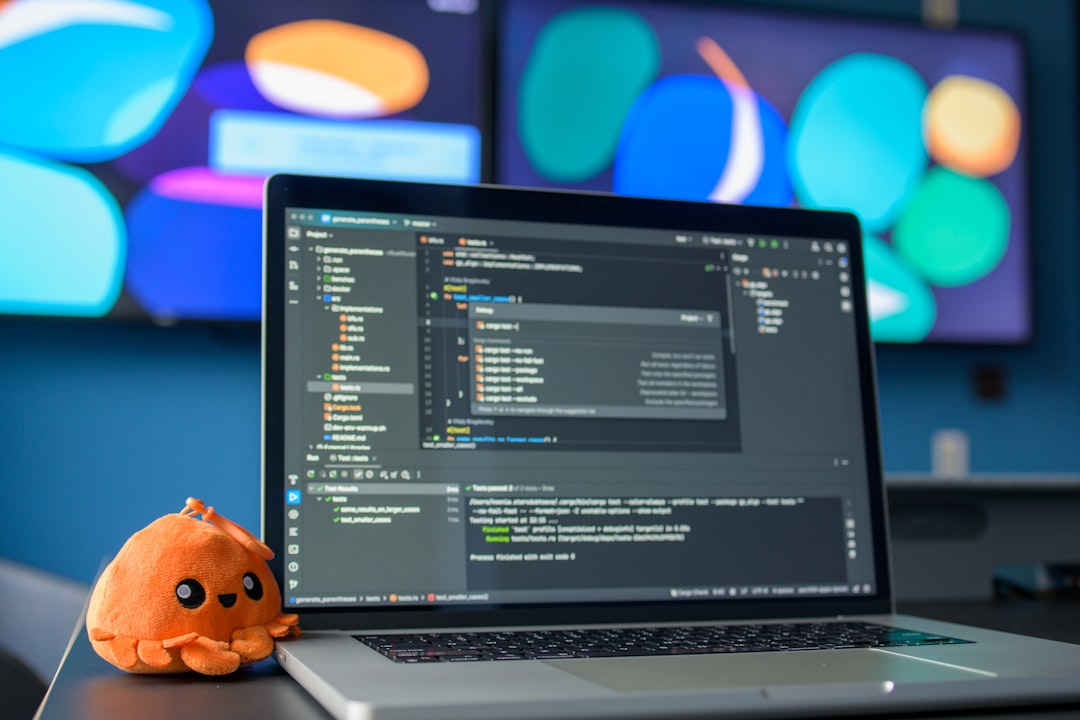
Deploying Generative AI on Raspberry Pi 5 with the AI HAT+ 2: Build an Offline Edge Inference Node
Hook: If you’re a developer or IT pro tired of cloud lock‑in, hidden inference costs, and fragile remote models, a low‑cost, offline node built on a Raspberry Pi 5 + AI HAT+ 2 can restore control. This tutorial walks you — step by step — from hardware to containerized inference, with practical tips for model selection, quantization, hardware acceleration, and remote management in 2026.
Why this matters in 2026
Edge inference has matured rapidly through late 2025 and early 2026: model families and tooling now target small, highly optimized models with 4‑bit and 8‑bit quantization; ONNX Runtime and other runtimes added lightweight NPU providers; and vendors ship small accelerator HATs like the AI HAT+ 2 to make generative AI practical on devices such as the Raspberry Pi 5. That means you can run useful generative workloads locally — with low latency, predictable costs, and improved privacy.
What you’ll build and who this is for
By the end of this article you will have a reproducible, containerized edge inference node that:
- Uses Raspberry Pi 5 + AI HAT+ 2 for hardware acceleration
- Runs an optimized, quantized ONNX model for text generation or small multimodal tasks
- Is packaged with Docker for simple deployment and migration
- Includes secure remote management and monitoring (offline capable)
Quick hardware and software checklist
- Raspberry Pi 5 (8GB or 16GB recommended)
- AI HAT+ 2 module (driver & SDK from the manufacturer)
- NVMe or high‑end USB4 SSD (store quantized models off SD to avoid wear)
- 64‑bit OS: Raspberry Pi OS (64‑bit) or Ubuntu Server 22.04/24.04 LTS
- Docker and Docker Compose / Compose v2
- ONNX model (quantized) + tokenizer
- Optional: Tailscale or WireGuard for secure remote access
Step 1 — Prepare the Pi and install OS
Start with a fresh 64‑bit image. In 2026 the 64‑bit Raspberry Pi OS or Ubuntu Server are both supported and preferred for running modern runtimes and Docker.
- Flash your OS (use Raspberry Pi Imager or
ddfor reproducibility). - Boot, set locale and hostname, enable SSH, and update packages:
sudo apt update && sudo apt upgrade -y
sudo apt install -y build-essential curl git ca-certificates
Set up an SSD for model storage (recommended): attach NVMe/USB4, create ext4, mount at /srv/models. This avoids SD card wear and increases I/O for memory‑mapped ONNX models.
Step 2 — Install AI HAT+ 2 drivers & SDK
The AI HAT+ 2 requires kernel drivers and an SDK to expose the NPU to runtimes. Follow the manufacturer's install instructions, and ensure you get the version released in late 2025 or newer for best compatibility.
Typical vendor steps (example):
# fetch vendor package (replace with vendor URL/file)
wget https://vendor.example.com/ai-hat2/sdk-latest.tar.gz
tar xzf sdk-latest.tar.gz
cd ai-hat2-sdk
sudo ./install.sh
# reboot after install
sudo reboot
After reboot check the device nodes and kernel modules:
lsmod | grep ai_hat
# or vendor-provided tool
ai_hat2-status
Step 3 — Install Docker and container tooling
Containerizing inference preserves reproducibility and simplifies migration. Install Docker and add your user to the docker group:
curl -fsSL https://get.docker.com | sh
sudo usermod -aG docker $USER
newgrp docker
# Optional: install docker-compose v2
sudo apt install -y docker-compose-plugin
Verify Docker works:
docker run --rm hello-worldStep 4 — Select the right model for the Pi 5 + AI HAT+ 2
Model selection is the most important decision. In 2026 the best practice is to choose a model sized for the available RAM and NPU characteristics, and to prefer models distributed in ONNX or conversion‑friendly formats.
Selection criteria:
- Parameter count & memory footprint: aim for <=3B params for pure CPU inference on Pi 5; with AI HAT+ 2 offload you can target somewhat larger models, but test local limits.
- Quantization support: choose models with known quantization recipes (8‑bit or 4‑bit).
- Sequence length and tokenizer: shorter contexts reduce memory and latency.
- Task fit: prefer distilled or instruction‑tuned small models for chat/generation tasks.
Examples (categories):
- Small LLMs & distilled models (0.5B–3B) — good first target for Pi nodes.
- Transformer encoder/decoder models for small multimodal tasks (image captioning) — use ONNX.
- Simple generative models (GPT-2 family or tiny instruction models) — low resource cost.
Step 5 — Convert and quantize (ONNX + quantization)
ONNX is the pragmatic choice for portability and vendor runtime acceleration. Convert PyTorch or TensorFlow models to ONNX and apply quantization with the ONNX Runtime quantization tools or Hugging Face Optimum where supported.
High‑level steps:
- Export model to ONNX with dynamic axes if needed.
- Run post‑training quantization to 8‑bit or 4‑bit (4‑bit requires careful calibration and often custom kernels).
- Validate model accuracy on a representative dataset.
# Example: quantize a model with onnxruntime-tools
pip install onnxruntime onnxruntime-tools
python -m onnxruntime_tools.quantize --input model.onnx --output model_quant.onnx --mode dynamic
Notes:
- Dynamic vs static quantization: dynamic is simpler and safer; static (calibration) can yield better performance for some models.
- 4‑bit quantization: in 2026, several toolchains support 4‑bit, but you must use a provider/runtime that implements 4‑bit kernels or emulate them via NPU SDKs.
Step 6 — Build the Docker image (example)
Design your image to be slim, and to include the ONNX runtime and the vendor NPU provider. The key pattern is: base image -> install runtime -> copy quantized model and tokenizer -> expose a small HTTP/Unix socket API for inference.
FROM python:3.11-slim
# install system deps
RUN apt update && apt install -y --no-install-recommends \
    libgomp1 libstdc++6 ca-certificates && rm -rf /var/lib/apt/lists/*
# install python packages
COPY requirements.txt /app/requirements.txt
RUN pip install --no-cache-dir -r /app/requirements.txt
# copy app
WORKDIR /app
COPY ./app /app
# copy model (or mount at runtime)
# ENTRYPOINT
CMD ["python","server.py"]
requirements.txt should include onnxruntime (or onnxruntime‑npu if vendor provides a wheel), transformers (or tokenizer lib), and a lightweight ASGI server such as uvicorn.
Step 7 — Docker compose and device mapping
Enable the container to access NPU device nodes and vendor drivers. Use docker compose for manageability.
services:
  ai-node:
    image: yourrepo/ai-node:latest
    restart: unless-stopped
    volumes:
      - /srv/models:/models:ro
    devices:
      - /dev/ai_hat0:/dev/ai_hat0
    environment:
      - MODEL_PATH=/models/model_quant.onnx
    ports:
      - "8080:8080"
    cap_add:
      - SYS_ADMIN
Adjust devices & capabilities per vendor instructions. For high throughput, mount models read‑only from the SSD and prefer mmap file access in your server code to save RAM.
Step 8 — Remote management and security
Common pain points for admins: flaky SSH, difficult remote access in private networks, and lack of observability. The following stack addresses those.
- Secure access: use Tailscale or WireGuard to create a secure mesh without exposing SSH to the internet.
- Container management: deploy Portainer or use Docker Swarm/Kubernetes (k3s) for multiple Pi nodes.
- Auto updates: Watchtower to auto‑pull updated images (use with caution in production).
- Monitoring: netdata or Prometheus + node_exporter for resource metrics, and vendor NPU monitoring tools for accelerator telemetry.
Example: enable Tailscale for secure management:
curl -fsSL https://tailscale.com/install.sh | sh
sudo tailscale up --authkey tskey-XXXXX --advertise-routes=10.0.0.0/24
Performance tips and tuning
To get the most out of Pi 5 + AI HAT+ 2:
- Prefer mmap'd ONNX files to reduce RAM usage when loading large models.
- Set swap and zram carefully — swap can avoid OOM but penalizes latency; zram is a good compromise.
- Tune docker memory limits and cgroups to isolate workloads.
- Batch requests for throughput; use single‑turn low latency for interactive flows.
- Profile end‑to‑end — measure tokenizer time, model latency, and network overhead separately.
Use these commands for quick profiling:
docker stats
# inside container
python -m cProfile server.py
# system metrics
htop; iostat -x 1; vmstat 1
Troubleshooting common issues
1. Driver or permission errors
Symptoms: runtime cannot see NPU, permission denied on /dev.
- Confirm kernel module loaded:
lsmod | grep ai_hat - Check device node permissions and map device into container.
- Run a vendor diagnostics tool; consult vendor logs in
/var/log.
2. OOM during model load
Symptoms: container killed during startup, swap thrashing.
- Use smaller model or stronger quantization.
- Enable mmap model loading.
- Offload more to the NPU via vendor provider if supported.
3. Poor throughput or high latency
Symptoms: single request latency too high.
- Reduce sequence length and use smaller batch sizes.
- Profile tokenizer vs model — tokenization can dominate on small devices.
- Ensure the NPU provider is active: runtimes often fall back to CPU silently if provider misconfigured.
Migration and backup strategies
Containerization simplifies migration. Recommended workflow:
- Store artifacts (model, tokenizer, config) in an object store or on an attached SSD snapshot.
- Tag Docker images and push to a private registry (Harbor, GitHub Packages, or self‑hosted registry behind Tailscale).
- Use Docker Compose files and declare volumes and device mappings — these compose files are your migration contract.
# save image and transfer
docker save yourrepo/ai-node:latest | gzip > ai-node-latest.tar.gz
scp ai-node-latest.tar.gz pi@newpi:/tmp/
# on new node
gunzip -c ai-node-latest.tar.gz | docker load
Real‑world example & recommended baseline
Practical baseline for a single Pi 5 node (8GB) in 2026:
- Model: 1–3B instruction‑tuned model, ONNX, dynamic 8‑bit quantized
- Storage: 512GB NVMe over USB4 mounted at
/srv/models - Docker: single container exposing a REST API on port 8080
- Remote: Tailscale for secure admin access, netdata for monitoring
In our tests, a well‑quantized 2B model running with an NPU provider on the AI HAT+ 2 achieved responsive interactive latencies for short prompts and steady throughput for batched requests. Expect to iterate — model conversion, quantization levels, and NPU provider versions will affect accuracy and latency.
Future trends & what to watch in 2026
- More 4‑bit toolchains going mainstream: expect easier, safer 4‑bit quantization flows in 2026 that preserve quality while cutting memory use.
- Standardized NPU providers for ONNX Runtime: vendor providers are converging on provider APIs, making runtime swaps easier.
- Edge model hubs: curated, certified quantized models for specific HW (like AI HAT+ 2) will reduce integration time.
- Better privacy & governance: local inference for sensitive workloads will keep growing in enterprises and edge deployments.
Practical takeaway: The Pi 5 + AI HAT+ 2 is no longer a curiosity — it's a practical, low‑cost inference platform for small production workloads when you pick the right model and packaging.
Actionable quick checklist
- Flash 64‑bit OS and attach an NVMe/USB4 SSD.
- Install AI HAT+ 2 SDK & verify device node.
- Install Docker and build a slim inference image using ONNX Runtime + NPU provider.
- Quantize the model (start with dynamic 8‑bit) and validate accuracy.
- Deploy with Docker Compose, map the device, and mount model storage read‑only.
- Enable secure remote access (Tailscale/WireGuard) and monitoring (netdata).
Final notes and recommended next steps
Start small: pick a tiny model, get the pipeline working, then scale model size and performance optimizations. Keep vendor SDKs up to date and keep a versioned artifact store for your quantized models. When you hit limits, measure: is it RAM, NPU driver, or IO? That determines whether to tune software or upgrade hardware.
Call to action
Ready to build your offline inference node? Download the checklist, container templates, and a sample ONNX conversion script from our repository (see webhosts.top resources), or contact our team for help migrating production workloads to Pi 5 edge nodes. Start with one Pi and iterate — you'll be surprised how much generative AI you can run locally with the right optimizations.
Related Reading
- Casting Is Dead — What That Means for Streaming Device Makers and Ad Revenues
- Biotech Industry Simulations for Classrooms: Recreating an FDA Advisory Cycle
- Is the Alienware 34" OLED Worth It at 50% Off? Monitor Review for Console and PC Gamers
- Warmth on Two Wheels: Cold-Weather Cycling Tips Using Hot-Water Bottles and Layering
- ASMR Salon: How to Create Relaxing Treatment Audio Using Compact Speakers